Building a Scalable Weather API Gateway with Azure API Management
Learn how to design and document a scalable weather API gateway using Azure API Management. This guide walks you through simulating the setup process, implementing key features like caching and rate limiting, and creating professional documentation to showcase your skills.

Building a Scalable Weather API Gateway with Azure API Management
Imagine planning a weekend trip, only to be caught off guard by unexpected rain. Now think about the technology that powers your weather app, alerting you in real-time about conditions. APIs like OpenWeather provide the backbone for such critical services, delivering data to millions of users worldwide.
But how do these APIs integrate seamlessly into systems that require scalability, security, and efficient management? Enter Azure API Management (APIM)—a powerful tool for creating, managing, and monitoring APIs at scale.
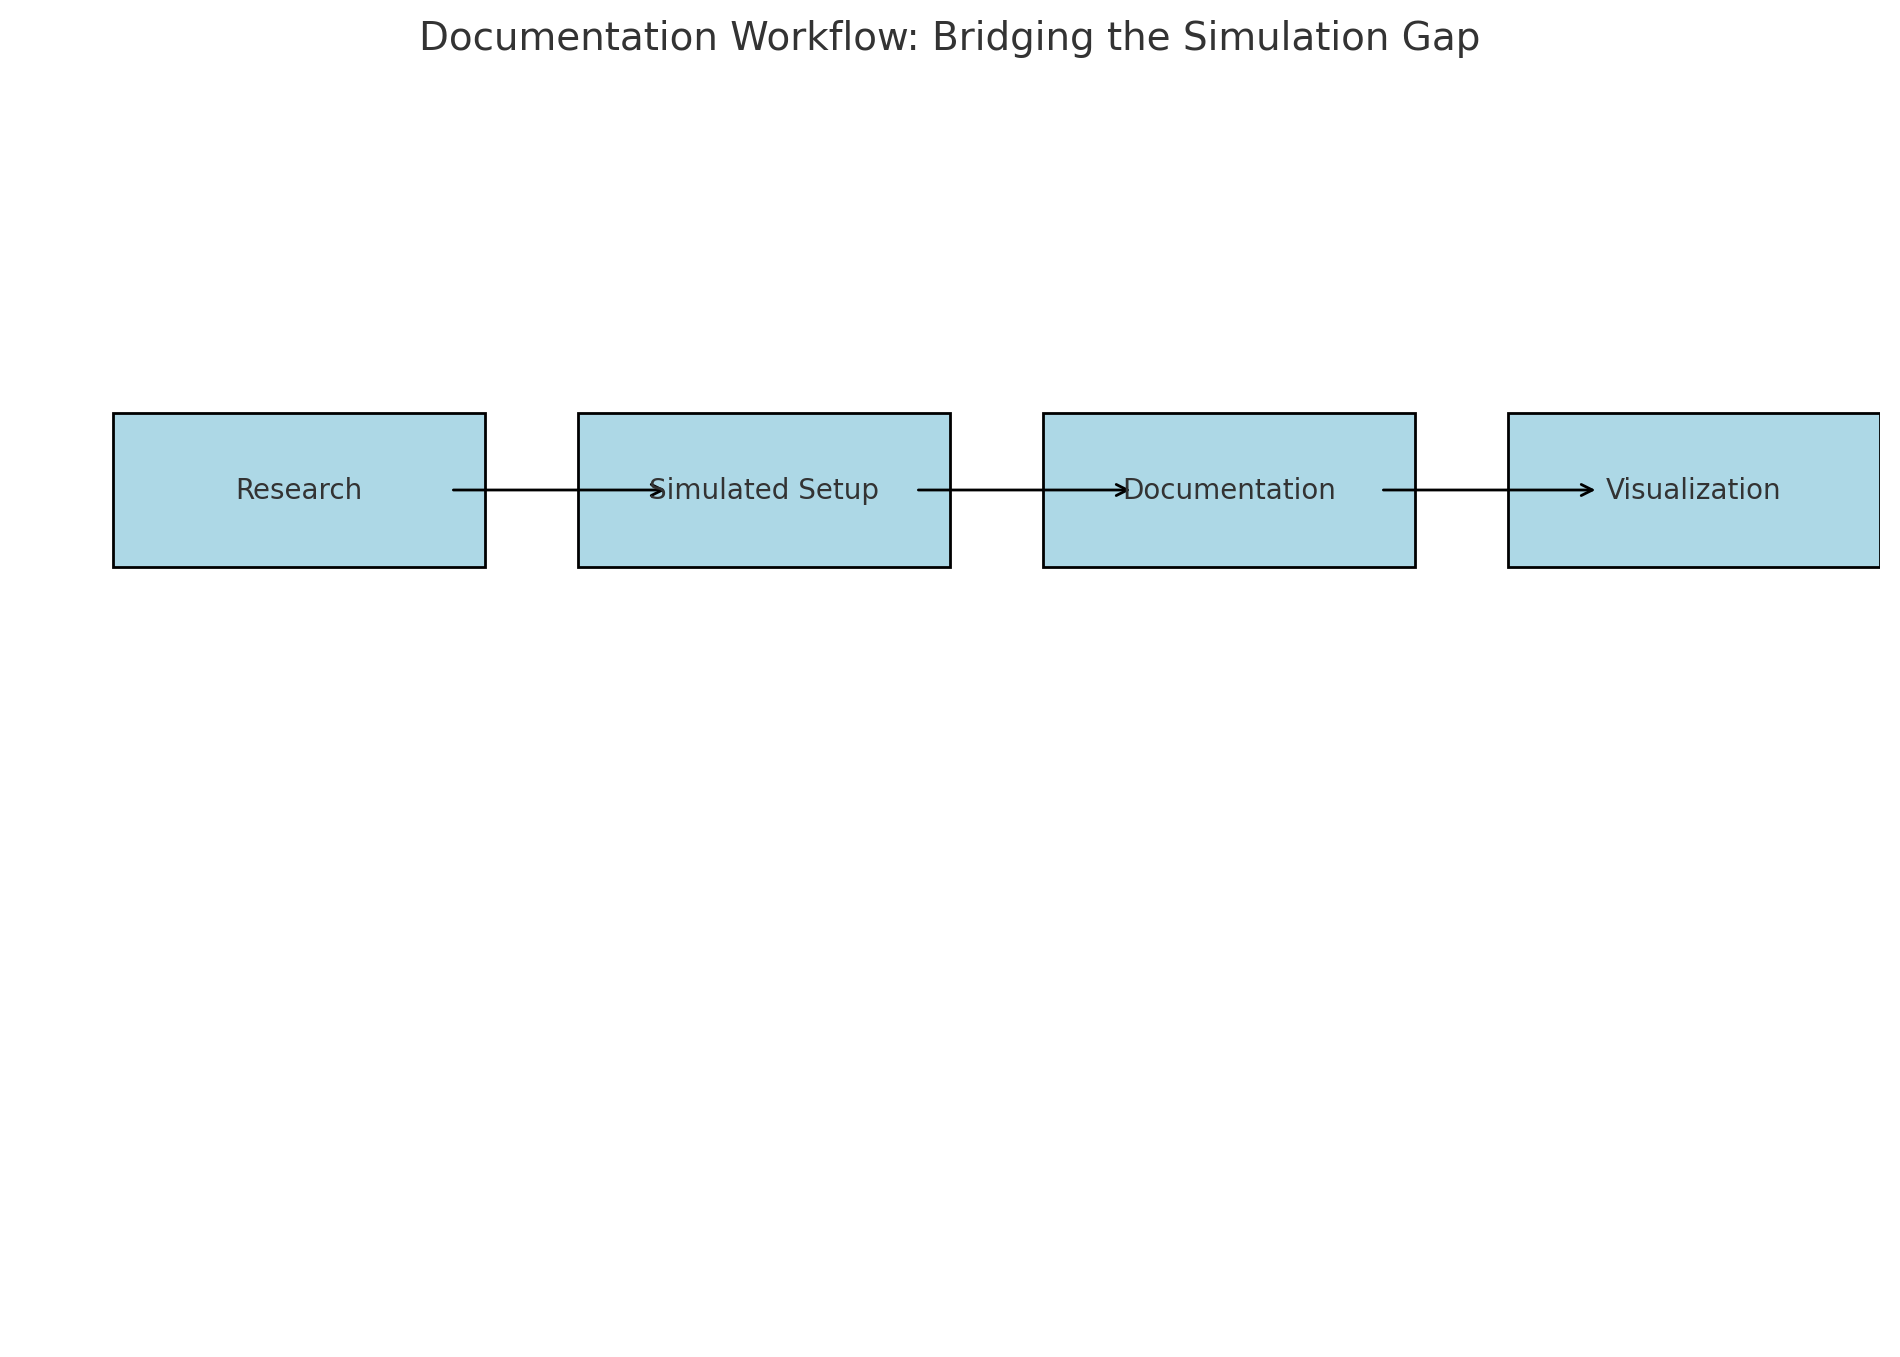
In this post, I’ll walk you through the process of simulating a weather API gateway using Azure API Management. Even without direct access to Azure resources, you’ll gain a practical understanding of designing a gateway, implementing policies, and documenting the setup.
What You’ll Learn
Here’s what we’ll cover:
- Designing an API Gateway for the OpenWeather API.
- Simulating setup and configuration with Azure API Management.
- Implementing features like caching, rate limiting, and response transformation.
- Documenting the process to showcase your API design skills.
Whether you’re new to Azure API Management or looking to polish your API integration skills, this guide will help you build and document a real-world project that demonstrates your expertise.
Project Concept
Goal
The primary objective of this project is to design and document a weather API gateway that allows seamless integration of weather data into applications. The gateway will simulate a setup in Azure API Management (APIM) to showcase key features like API management, caching, rate limiting, and response transformation.
Key Tools
Azure API Management (APIM):
APIM is a robust platform that enables developers to expose APIs securely, manage traffic, and monitor usage. In this project, APIM will act as the gateway between the client application and the backend weather API.OpenWeather API:
OpenWeather provides real-time weather data, including temperature, humidity, wind speed, and weather conditions. It serves as the backend service that powers the gateway.
Use Case
Imagine a scenario where a travel planning app requires real-time weather updates to assist users in choosing destinations. The API gateway will provide the following functionality:
- Search by City Name: Users can input a city name to get the current weather.
- Search by Coordinates: Apps can query weather data for specific geographical locations.
- Search by ZIP Code: Users can retrieve weather data by ZIP code.
Functionality
- Scalability: Handle multiple user requests efficiently.
- Security: Secure backend calls with an API key.
- Optimization: Improve performance through caching of frequently accessed data.
- Rate Limiting: Prevent misuse by limiting the number of API requests per user.
- Custom Responses: Simplify and standardize the API responses for client applications.
Technical Architecture Summary
The API gateway will function as a mediator between the client and the OpenWeather API. Here’s how it works:
- Client Requests:
- The client sends a request to the API Gateway with query parameters (e.g., city name, coordinates, or ZIP code).
- Gateway Processing:
- Azure API Management validates the request.
- Policies (e.g., caching, rate limiting) are applied.
- The gateway appends the API key and forwards the request to OpenWeather.
- Backend Response:
- The OpenWeather API processes the request and returns a response.
- The gateway optionally transforms the response into a simplified format.
- Client Delivery:
- The processed response is sent back to the client application.
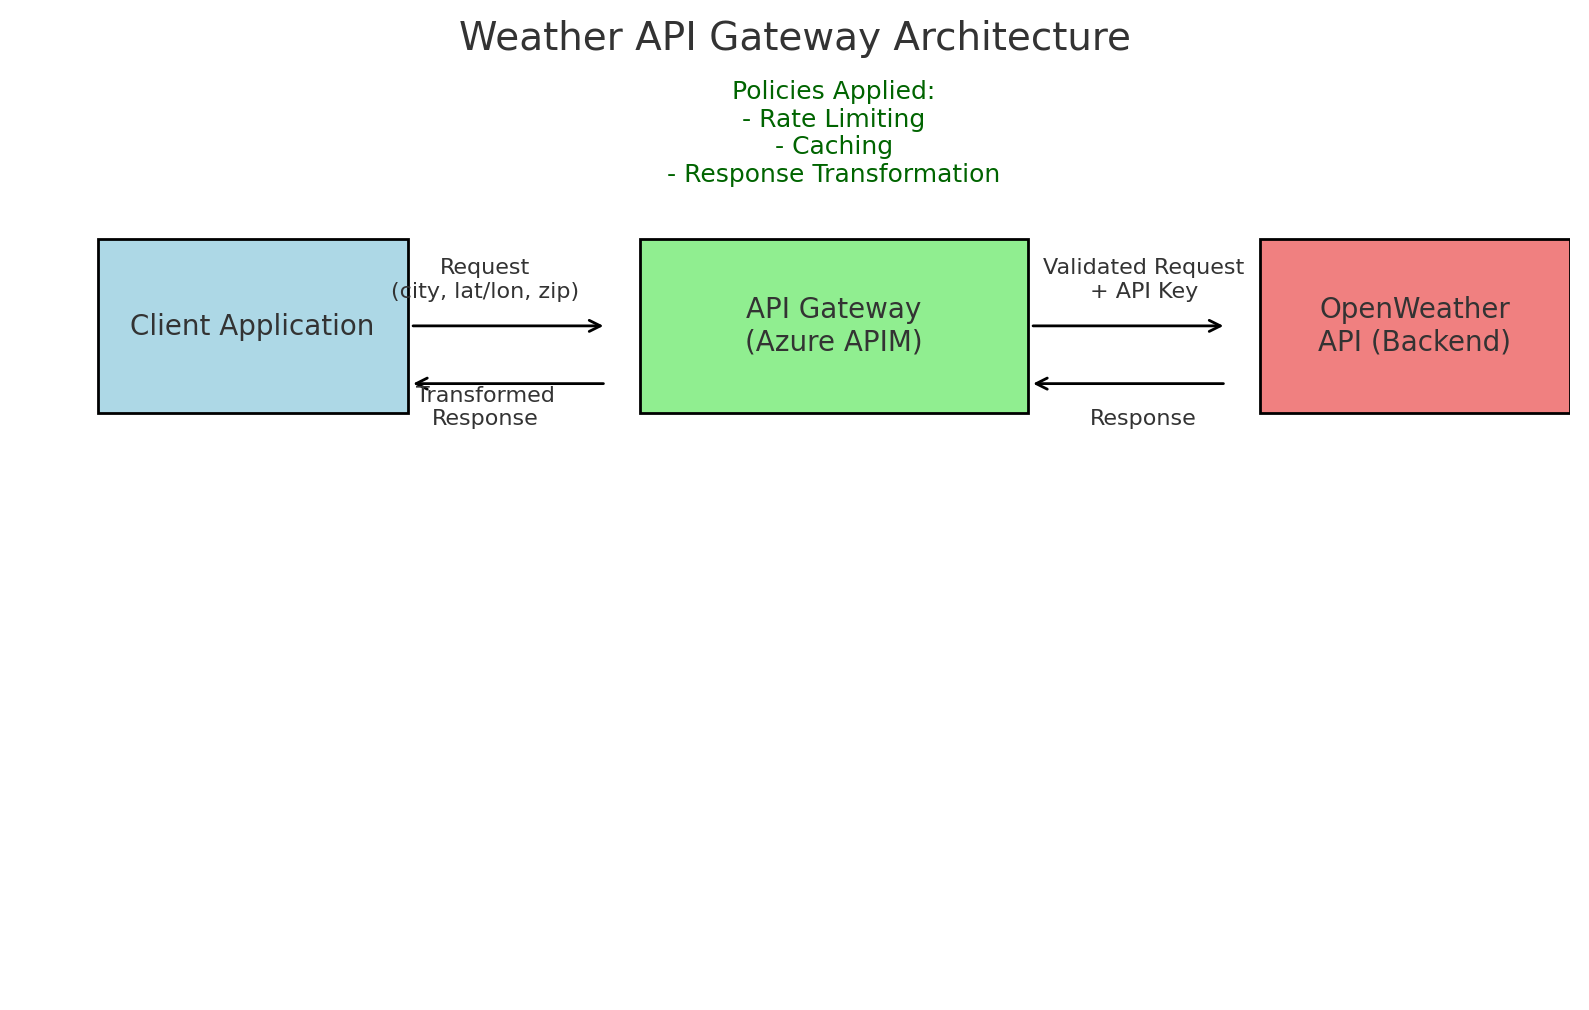
The diagram above illustrates the flow of requests and responses, highlighting how Azure API Management handles validation, policy application, and transformation to deliver a seamless experience.
Architecture Overview
Overview of the Design
The architecture for this Weather API Gateway is designed to ensure seamless integration between the client application and the OpenWeather API. The primary goals are scalability, security, and optimization of API interactions.
Here’s how the system works at a high level:
- Client Requests:
- Users interact with a client application (e.g., a web app or mobile app) to request weather data by city name, coordinates, or ZIP code.
- API Gateway:
- Azure API Management acts as the gateway, validating incoming requests and applying predefined policies like rate limiting and caching.
- The gateway appends the API key required by the OpenWeather API.
- Backend Communication:
- The API Gateway forwards validated requests to the OpenWeather API.
- The OpenWeather API processes the requests and sends back weather data in JSON format.
- Response Delivery:
- The API Gateway optionally transforms the response (e.g., extracting key fields like temperature and humidity).
- The client application receives the processed response for display or further use.
Key Components of the Architecture
- Client Application:
- Sends HTTP requests with parameters such as
city,lat/lon, orzip.
- Sends HTTP requests with parameters such as
- Azure API Management:
- Validates incoming requests.
- Enforces policies (rate limiting, caching, and response transformation).
- Appends the API key (
appid) to backend requests.
- OpenWeather API:
- Processes the requests and returns detailed weather data.
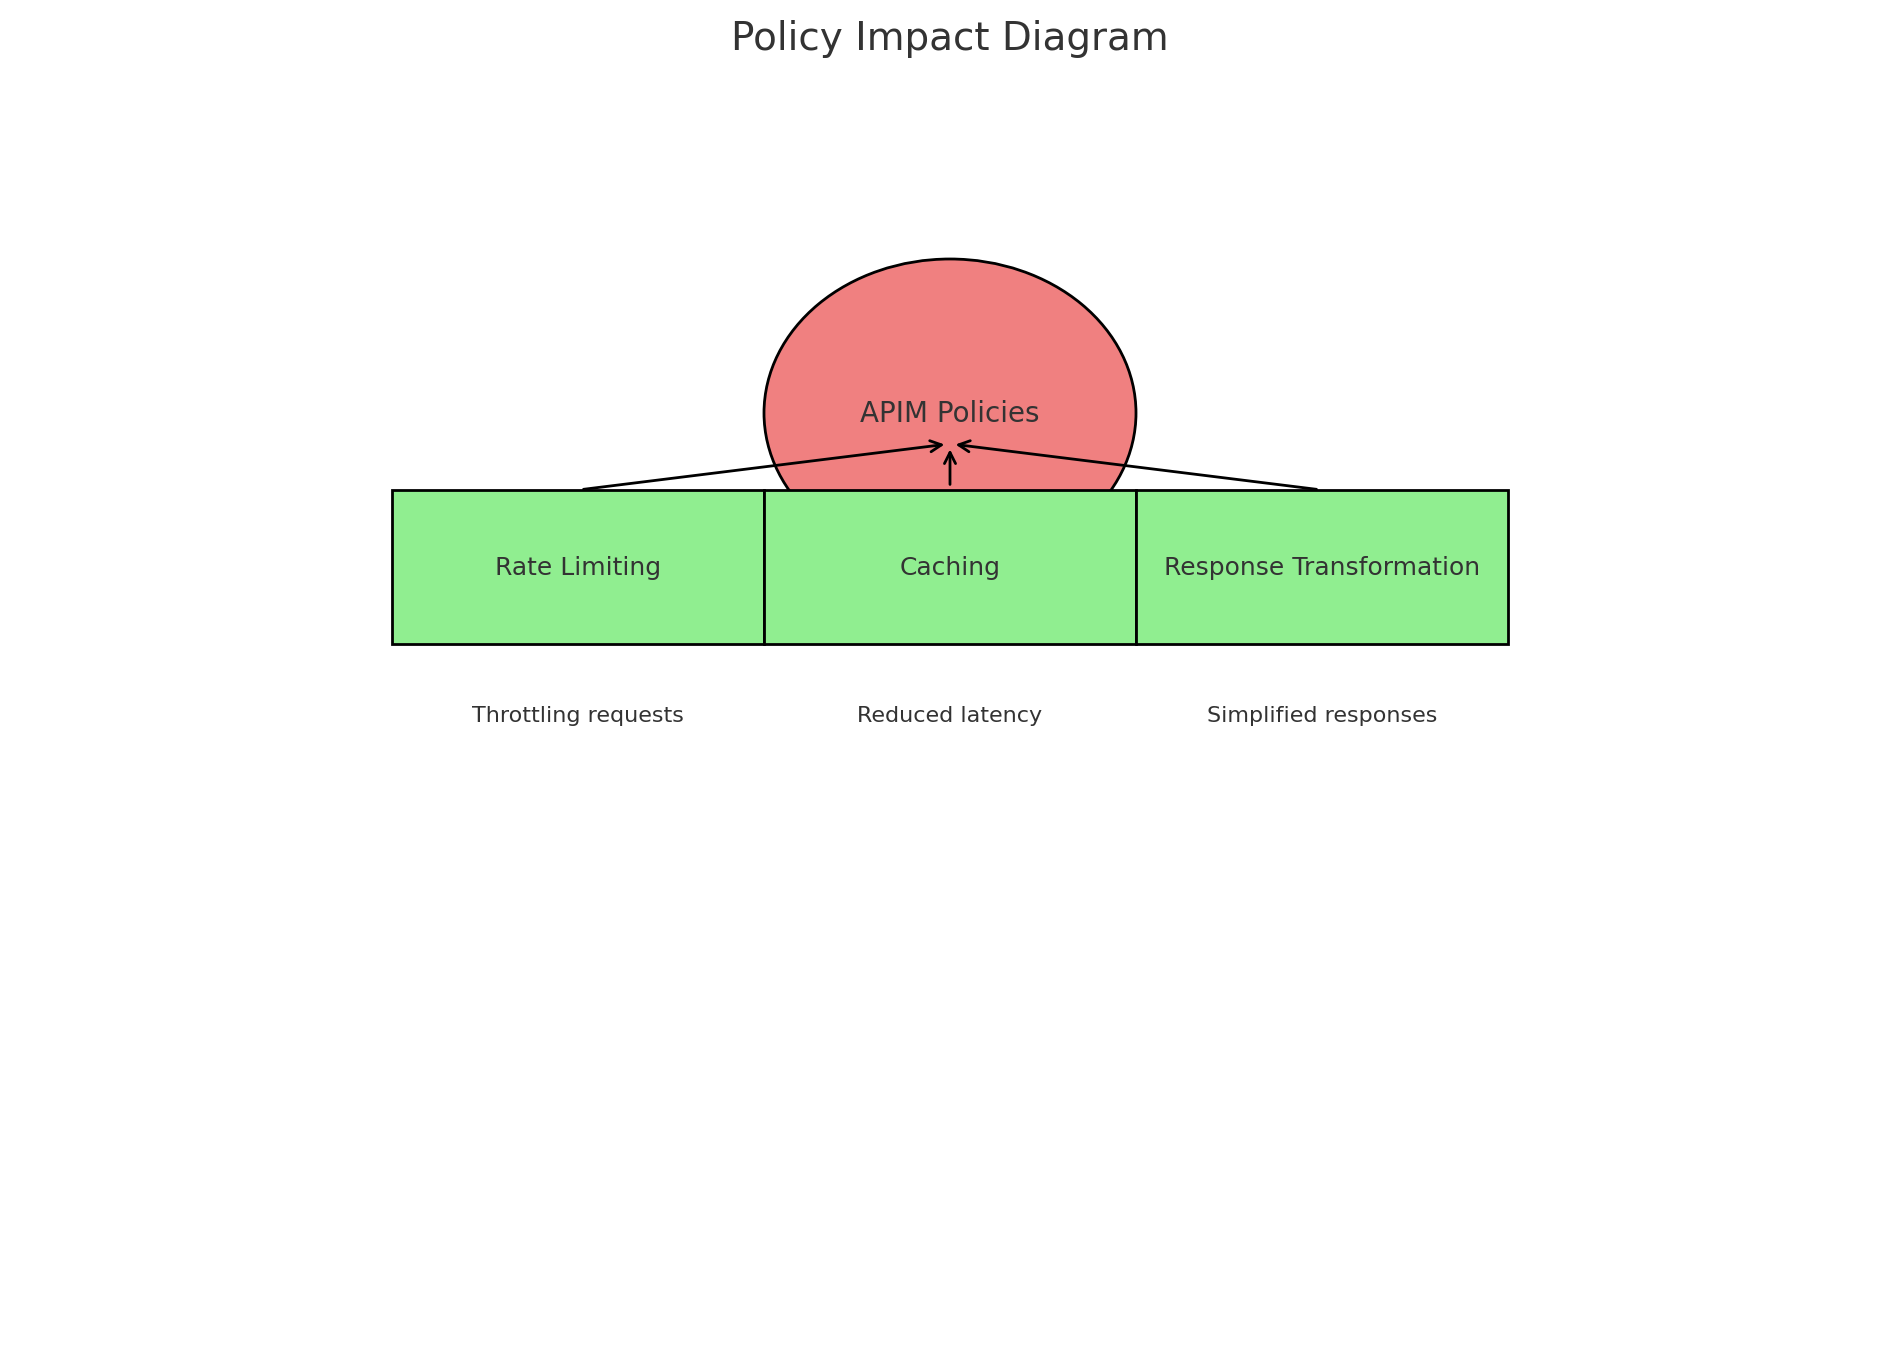
- Policies Applied:
- Rate Limiting: Limits the number of requests per user to prevent abuse.
- Caching: Reduces backend calls by storing frequent responses.
- Response Transformation: Simplifies JSON responses for client consumption.
Architecture Diagram
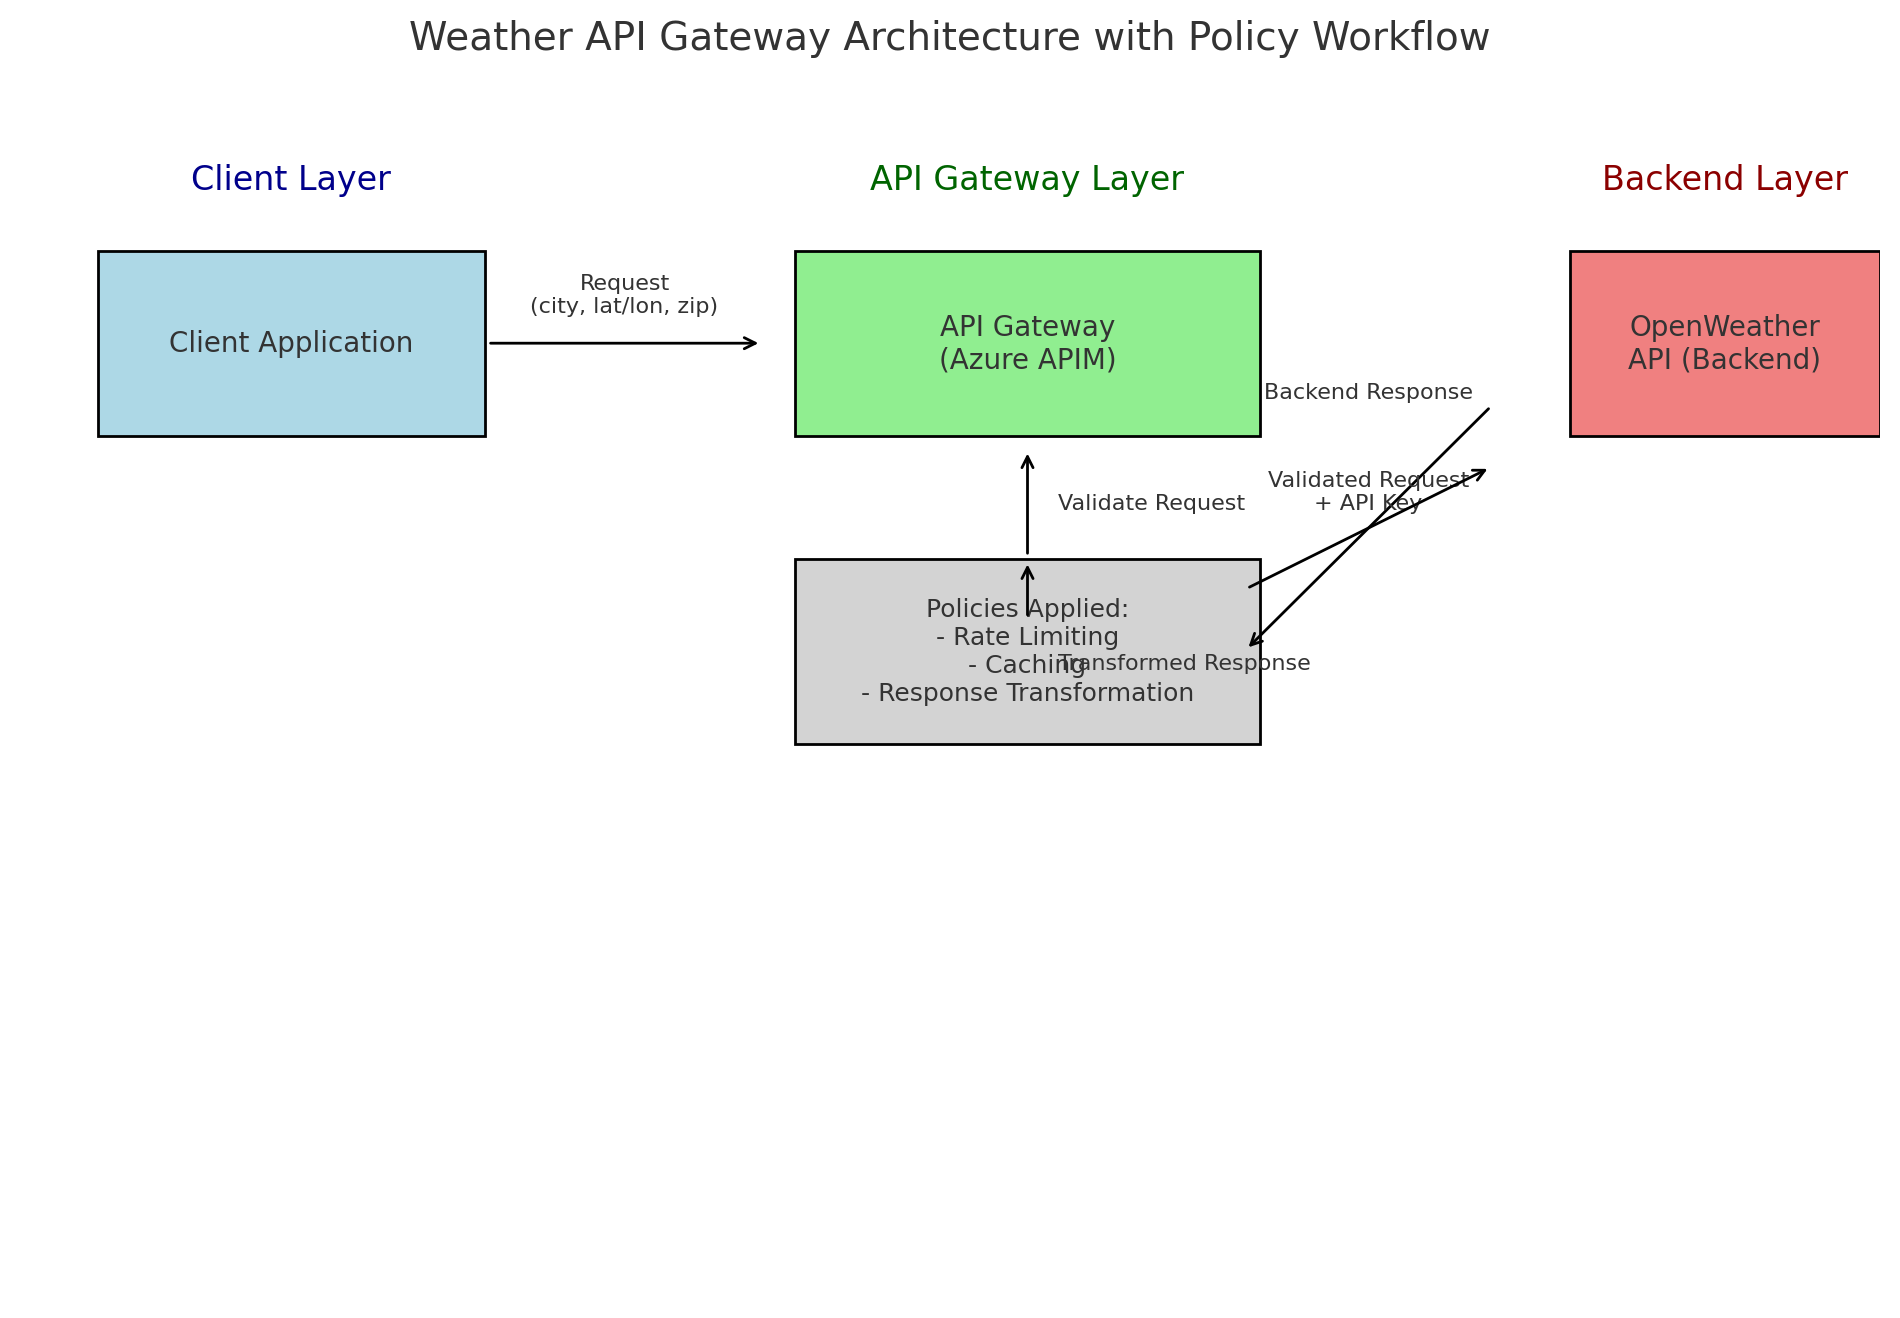
The diagram above illustrates the request flow:
- Client Requests: The user interacts with the client application to request weather data.
- API Gateway Processing: Azure API Management validates and processes the request, applying policies.
- Backend Communication: The gateway forwards the request to OpenWeather, receives the response, and optionally transforms it.
- Response Delivery: The transformed data is sent back to the client application for display.
Why This Architecture?
This architecture ensures:
- Scalability: The API Gateway can handle large numbers of requests efficiently.
- Security: Backend access is secured via the API key.
- Optimization: Policies like caching improve performance and reduce latency.
- Ease of Use: Simplified response formats make it easier for client applications to consume the data.
Step-by-Step Implementation
In this section, we’ll walk through the process of simulating the setup for the Weather API Gateway using Azure API Management. The following steps are designed to document the configuration and highlight the key components.
1. Create the Azure API Management Instance
To begin, you need an API Management (APIM) instance in Azure. Here’s how you would set it up:
- Log in to the Azure Portal.
- Search for API Management and select API Management Services.
- Click + Create and configure:
- Name:
weather-apim. - Region: Choose a location close to your users.
- Pricing Tier: Use Developer for cost-effective testing.
- Name:
- Click Review + Create and wait for the instance to be deployed.
2. Add the Weather API
Once the APIM instance is created, you can add the Weather API:
- Go to your APIM instance and click APIs > + Add API > Blank API.
- Fill in the details:
- Display Name:
Weather API Gateway. - Name:
weather-api. - Web Service URL:
https://api.openweathermap.org/data/2.5/weather. - API URL Suffix:
weather.
- Display Name:
- Save the API.
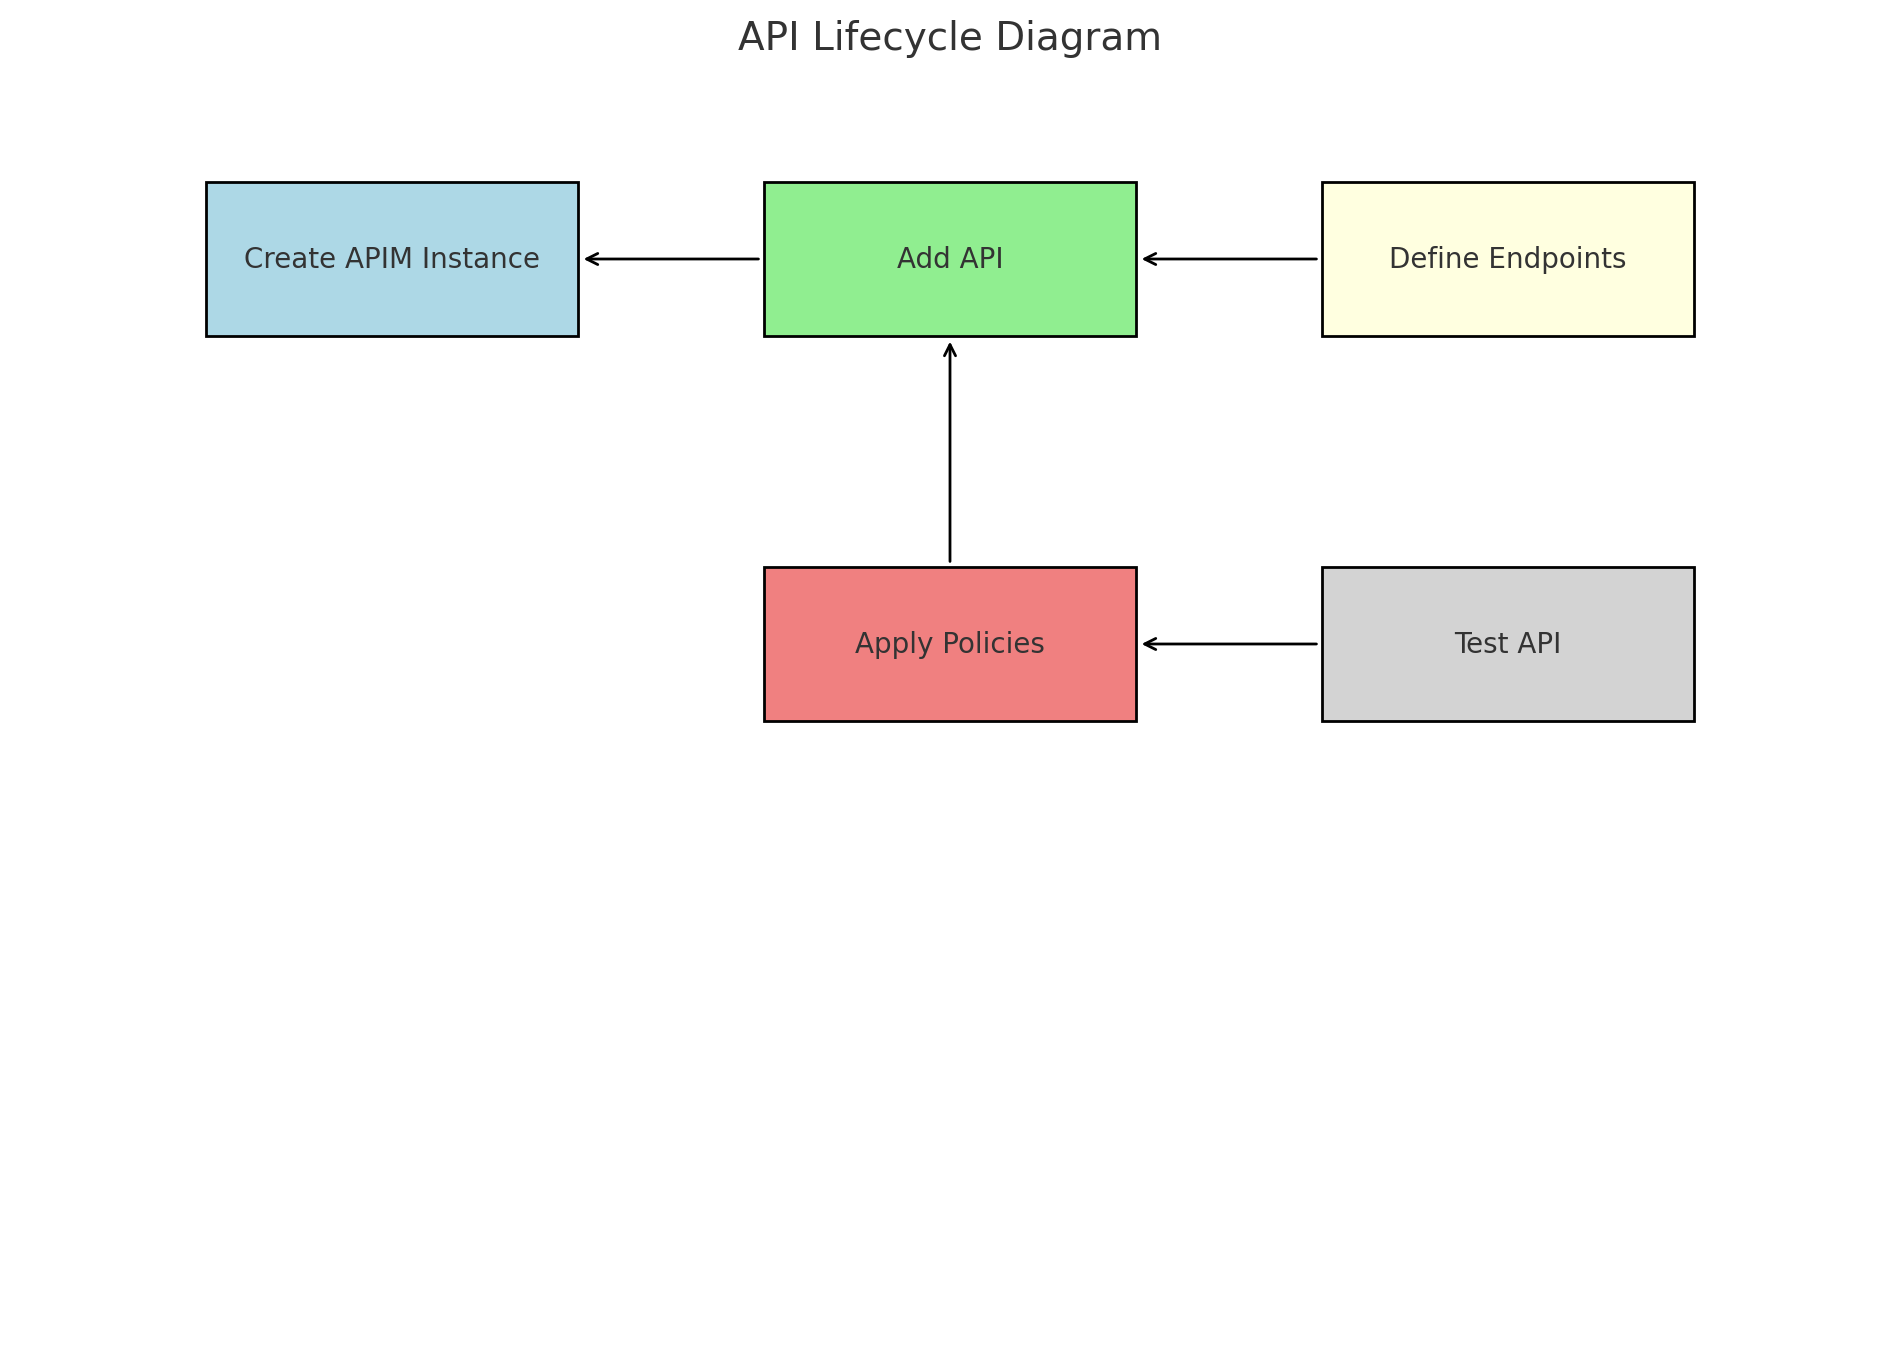
3. Define Operations (Endpoints)
You need to define the endpoints for the Weather API:
- By City Name:
- Click + Add Operation.
- Display Name:
Get Weather by City. - Method:
GET. - URL Template:
/weather. - Add a query parameter:
- Name:
city. - Type:
String. - Required: Yes.
- Name:
- By Coordinates:
- Repeat the steps above, but add parameters:
- Name:
lat. Type:String. Required: Yes. - Name:
lon. Type:String. Required: Yes.
- Name:
- Repeat the steps above, but add parameters:
- By ZIP Code:
- Repeat the steps above, but add a parameter:
- Name:
zip. Type:String. Required: Yes.
- Name:
- Repeat the steps above, but add a parameter:
4. Manage the API Key
To secure backend communication with the OpenWeather API:
- Store the API key in APIM:
- Go to Named Values in APIM.
- Create a new named value:
- Name:
openweather-apikey. - Value: Your OpenWeather API key.
- Enable Secret.
- Name:
- Reference the API key in the backend:
- In the operation’s policy editor, add:
1
2
3
<set-query-parameter name="appid" exists-action="override">
    <value></value>
</set-query-parameter>
- In the operation’s policy editor, add:

5. Apply Policies
Policies are used to enhance API functionality:
- Rate Limiting:
- Go to the operation’s Policy Editor.
- Add a policy to limit requests:
1
<rate-limit calls="100" renewal-period="3600" />
- Caching:
- Add a caching policy to reduce backend calls:
1
2
<cache-lookup vary-by-developer="false" />
<cache-store duration="300" />
- Add a caching policy to reduce backend calls:
- Response Transformation:
- Simplify the response by extracting key fields:
1
2
3
4
5
6
7
8
9
<set-body>
  <value>
    {
      "temperature": "@(context.Response.Body.As<JObject>()["main"]["temp"])",
      "humidity": "@(context.Response.Body.As<JObject>()["main"]["humidity"])",
      "condition": "@(context.Response.Body.As<JObject>()["weather"][0]["description"])"
    }
  </value>
</set-body>
- Simplify the response by extracting key fields:
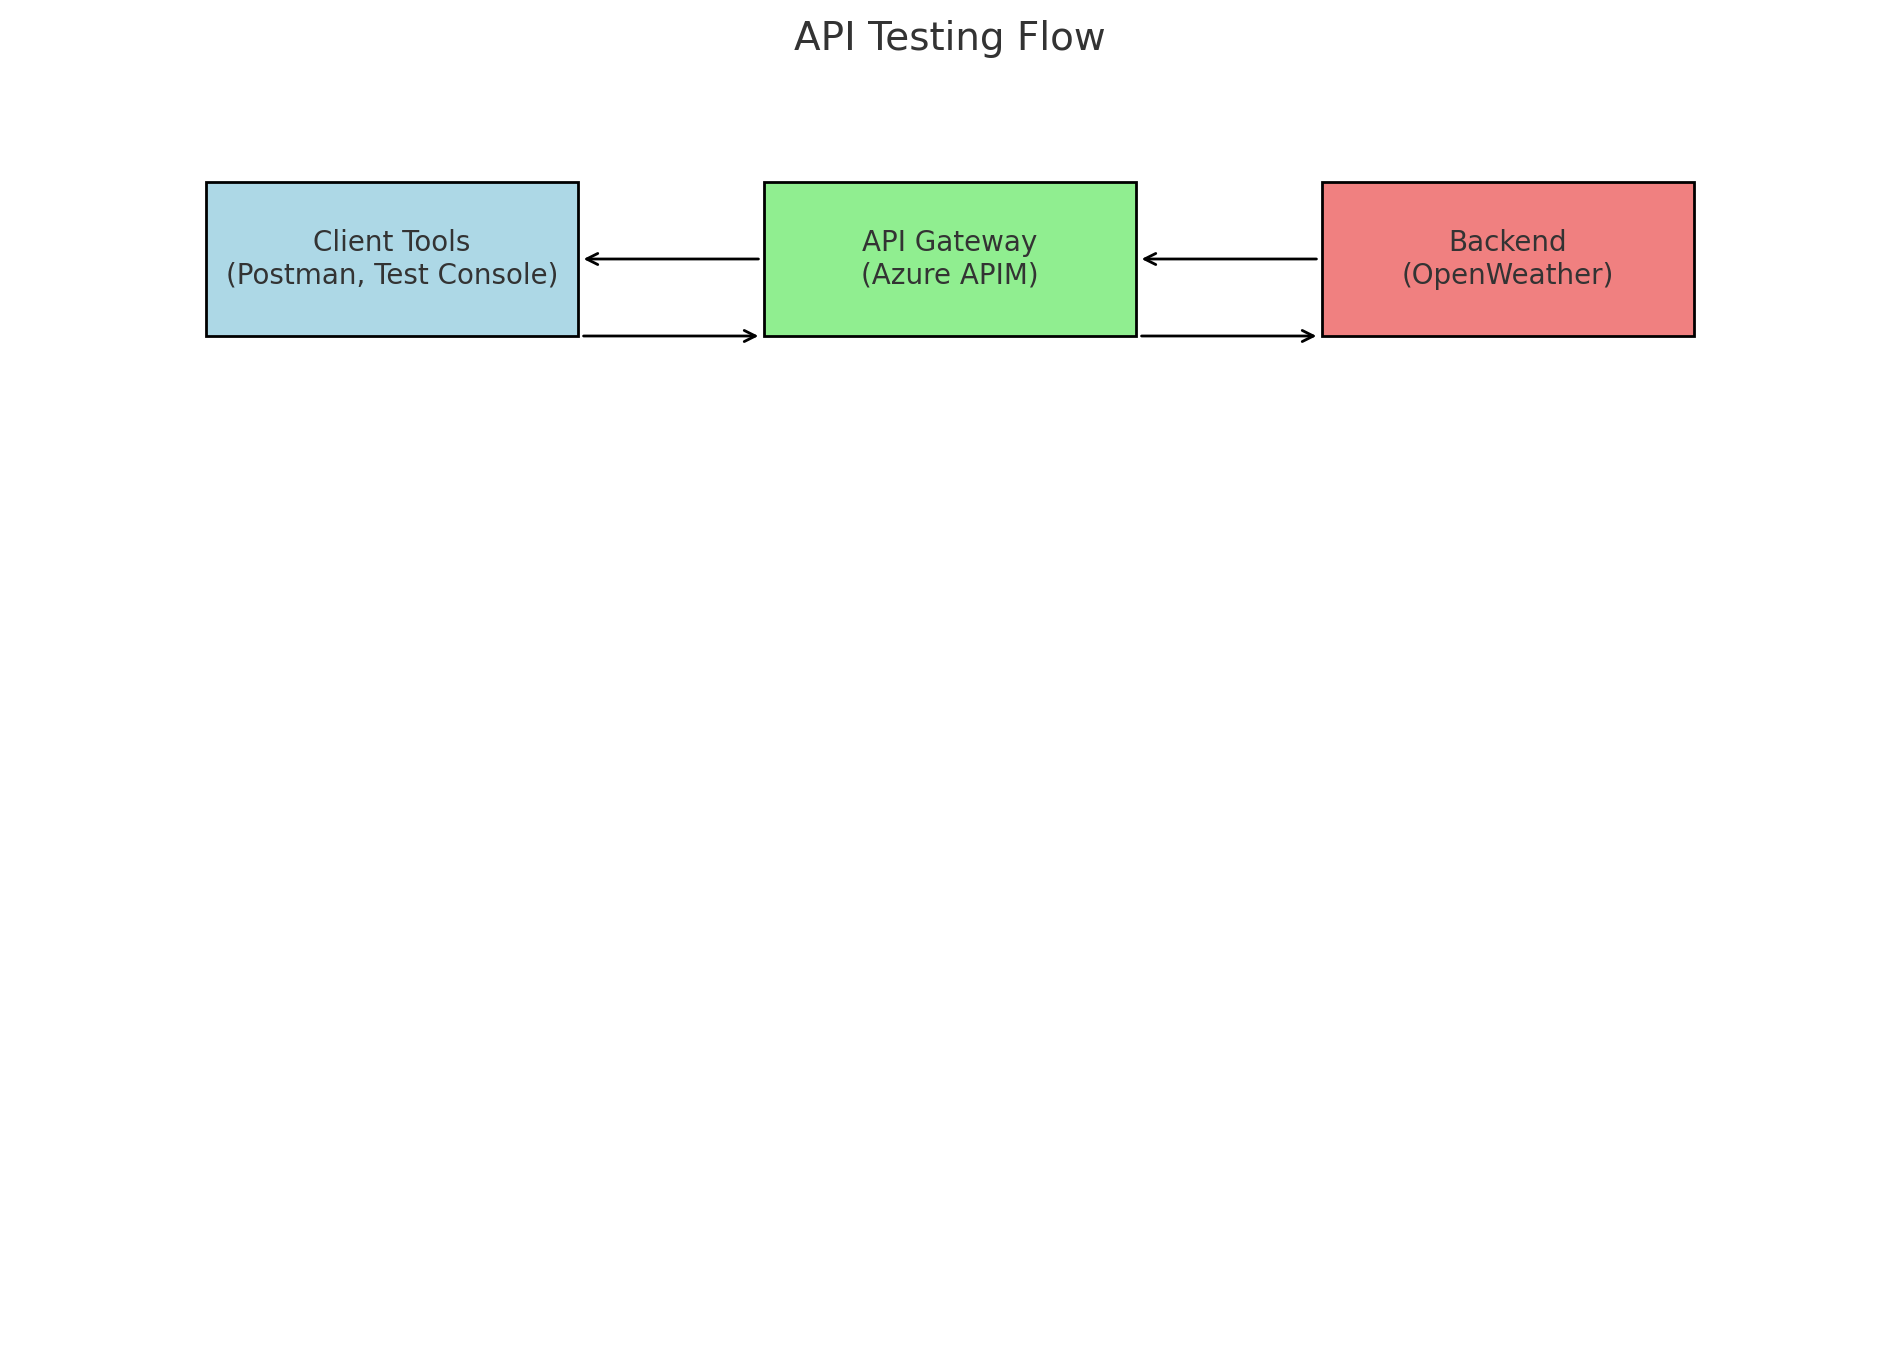
6. Test the API
To ensure the API functions correctly:
- Use APIM’s built-in Test Console:
- Select an operation (e.g.,
/weather?city={city_name}). - Enter sample data (e.g.,
city=London).
- Select an operation (e.g.,
- Use external tools like Postman to test the API Gateway URL.
7. Monitor and Optimize
Enable Application Insights in APIM to monitor:
- API usage (e.g., number of requests).
- Performance metrics (e.g., latency).
- Errors and logs for debugging.
Conclusion
Following these steps, you’ll have a documented process for setting up a scalable, secure, and optimized Weather API Gateway using Azure API Management.
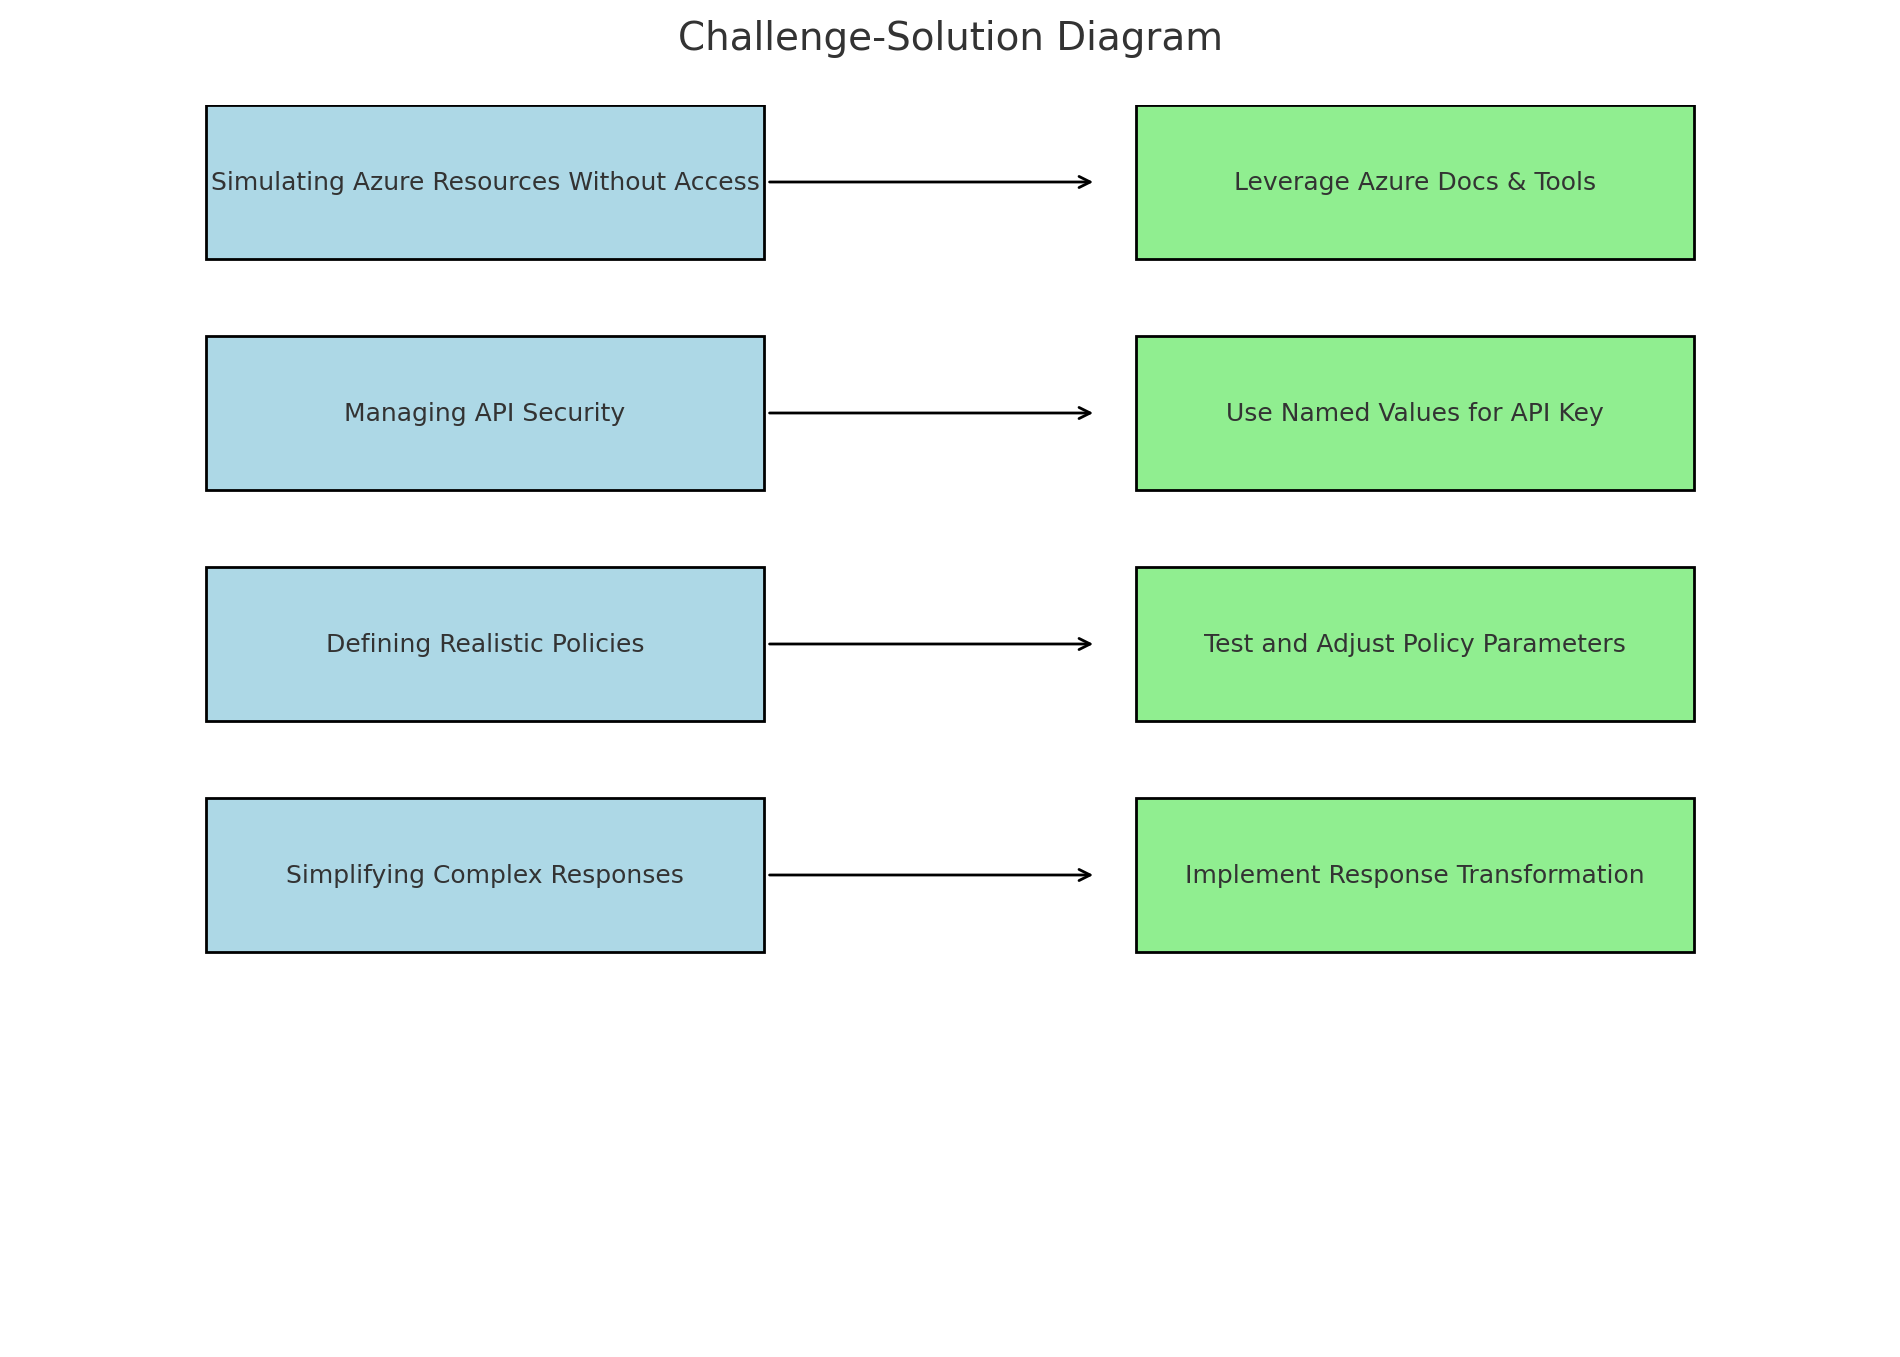
Challenges and Lessons Learned
Every project presents unique challenges, and this Weather API Gateway simulation was no exception. Here are some of the key challenges encountered during the project and the lessons learned from overcoming them.
Challenges
1. Simulating Azure Resources Without Access
Simulating the setup and configuration of Azure API Management (APIM) without direct access to the resources required a deep understanding of the platform’s capabilities and features. Creating detailed documentation for processes that were not physically executed meant relying on:
- Thorough research.
- Understanding of Azure documentation and community resources.
- Visualization tools to map the expected workflow.
2. Managing API Security
The OpenWeather API required an API key for access. Simulating secure storage and use of the API key highlighted the importance of:
- Properly managing sensitive data using Azure Named Values or environment variables.
- Ensuring security practices are documented and followed, even in a simulated environment.
3. Defining Realistic Policies
Designing rate-limiting, caching, and response transformation policies required balancing theoretical knowledge with practical application. Understanding how these policies work in real-world scenarios helped:
- Set appropriate limits to ensure performance.
- Optimize API responses for better client usability.
4. Simplifying Complex Responses
The OpenWeather API provides detailed responses, but client applications often require only key fields. Simplifying these responses with transformation policies was essential but required:
- Familiarity with JSON manipulation in APIM policies.
- An understanding of client-side expectations.
Lessons Learned
1. Importance of Documentation
Detailed documentation is critical when working in simulated environments or large-scale projects. Writing out every step helped:
- Clarify the workflow.
- Ensure nothing was overlooked.
- Create a reference for future projects.
2. Understanding API Management Best Practices
This project reinforced best practices for API management:
- Always secure backend services with API keys or OAuth.
- Use caching and rate-limiting to enhance performance and prevent abuse.
- Simplify responses to improve usability for client applications.
3. The Value of Policies
APIM’s policies are a powerful way to enhance API functionality. From rate limiting to response transformation, policies can:
- Protect backend services.
- Optimize API responses for specific use cases.
4. Visualization is Key
Diagrams and workflows played a crucial role in communicating the architecture and processes clearly. They also helped bridge the gap when direct implementation wasn’t possible.
5. Simulating Real-World Scenarios
Even in a simulated setup, thinking through real-world scenarios (e.g., handling high traffic, securing API keys) is invaluable. It helps prepare for actual implementation and ensures scalability and reliability.
Conclusion
This project offered valuable insights into the design and documentation of API gateways using Azure API Management. By addressing challenges and reflecting on lessons learned, the experience reinforced key concepts in cloud-based API management and prepared me for real-world projects involving scalable, secure API integration.
Conclusion and Next Steps
Conclusion
The Weather API Gateway project has been an invaluable exercise in understanding and simulating the design of scalable, secure, and optimized APIs using Azure API Management. This project demonstrated key skills, including:
- Designing API gateways to integrate with third-party services like OpenWeather.
- Applying Azure API Management policies for caching, rate limiting, and response transformation.
- Documenting a simulated environment with clear, actionable instructions and visual diagrams.
The project highlighted the importance of API management in modern cloud-based architectures, preparing me for real-world scenarios where scalability, security, and optimization are crucial.
Next Steps
1. Deploy the Gateway
In a real-world scenario, the next logical step would be to deploy the API Gateway in Azure and validate its functionality in a production-like environment. This would include:
- Testing the setup with live traffic.
- Monitoring performance using Azure Application Insights.
2. Add Authentication
While this project used an API key for security, integrating OAuth 2.0 or OpenID Connect would further enhance the gateway’s security, especially for multi-user applications.
3. Expand Functionality
The gateway could be expanded to support additional OpenWeather APIs, such as:
- Forecast Data: Provide weather forecasts for upcoming days.
- Air Pollution Data: Include real-time air quality metrics.
4. Build a Frontend
Develop a client-facing application (e.g., a weather dashboard or mobile app) to consume the API Gateway’s data and provide an interactive user experience.
5. Explore Other API Management Platforms
Although this project focused on Azure API Management, experimenting with platforms like AWS API Gateway or Google Cloud API Gateway would provide a broader understanding of cloud-native API management.
Final Thoughts
This project not only reinforced foundational concepts in API management but also provided hands-on experience in documenting workflows and addressing real-world challenges. Whether applied to enterprise solutions or personal projects, the skills and knowledge gained here will be instrumental in building efficient and secure APIs.
What will you build next?